
Snacks
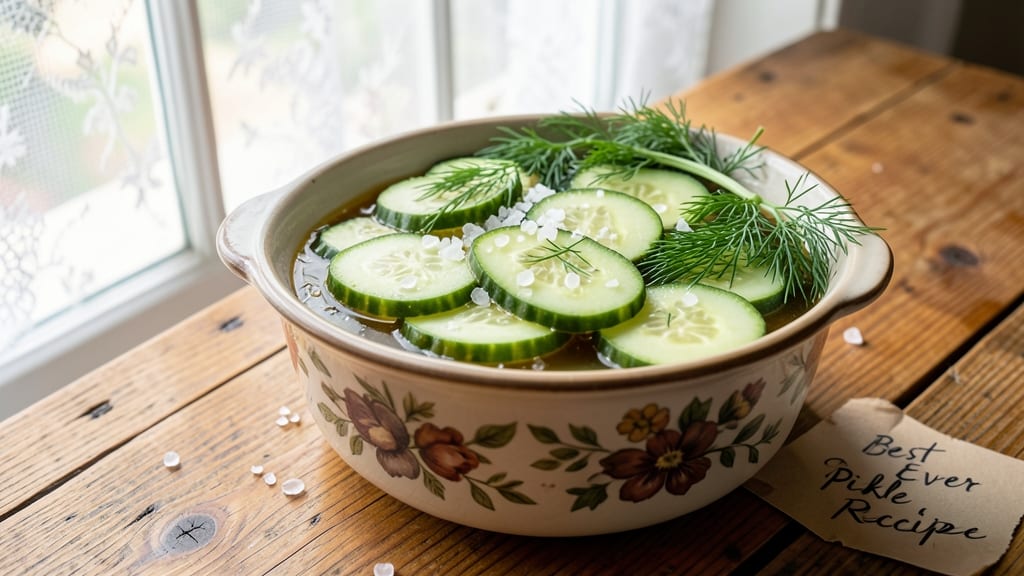
This best ever pickle recipe transforms simple cucumbers into vibrant, tangy crunch that rivals store-bought—with none of the preservatives. The secret lies in a precise vinegar brine ratio and proper fermentation time, ensuring crisp texture and bold flavor every time.
I’ve perfected this method over years of testing, and the results speak for themselves: restaurant-quality pickles you can make at home.
The process begins with fresh, firm cucumbers cut into uniform slices or spears—consistency is key for even pickling.
A simple brine of white vinegar, water, salt, and sugar creates the perfect balance of tang and sweetness, while optional additions like dill, garlic, or red pepper flakes allow for endless flavor variations. The fermentation step, if included, deepens the flavor profile without sacrificing crispness.
By the time your jar is sealed and resting, you’ll have pickles that are crisp, tangy, and packed with vibrant flavor—ready to elevate sandwiches, salads, or snack plates. The best part?
These pickles stay fresh for months, making them a pantry staple worth repeating. Whether you prefer classic dill or bold spicy varieties, this recipe delivers professional results with minimal effort.
For those who love customization, try swapping vinegar types (apple cider for a sweeter taste) or adding fresh herbs like thyme or basil. The possibilities are endless, but the foundation remains the same: a foolproof method for homemade pickles that taste better than anything you’ll find in a jar.
Ingredients for best ever pickle
Simple ingredients, big flavor—these are the building blocks for restaurant-quality pickles at home.
| Ingredient | Amount | Notes |
|---|---|---|
| Fresh Cucumbers 🥒 | 2 lb | Firm, seedless, uniform slices |
| White Vinegar 💧 | 2 cups | Distilled white vinegar preferred |
| Water 💧 | 2 cups | Filtered or boiled and cooled |
| Diamond Crystal Kosher Salt 🧂 | ½ cup | Not table salt—it's crucial |
| Granulated Sugar 🍚 | ½ cup | White or raw sugar works |
| Fresh Dill Weeds 🌿 | ¼ cup | Packed, stems removed |
| Garlic Cloves 🧄 | 6 cloves | Smashed, not minced |
| Red Pepper Flakes 🌶️ | 1 tbsp | Adjust for heat preference |
| Mustard Seeds 🌾 | 1 tsp | Yellow or brown seeds |
| Black Peppercorns 🌶️ | 1 tsp | Crushed lightly |
| Lemon Juice 🍋 | 2 tbsp | Freshly squeezed |
| Apple Cider Vinegar 🍎 | ½ cup | Optional for sweetness |
| Pickling Spice Blend 🌿 | 1 tbsp | Store-bought or homemade |
The cucumbers are your star, so pick firm, seedless ones—the kind that feel heavy for their size. Local farmers markets or Trader Joe's have the best selection, but any grocery store works. For extra crunch, slice them uniformly—about 1/4-inch thick. The vinegar matters too: distilled white vinegar gives the classic tang, but apple cider vinegar adds a sweet depth if you prefer that. I always grab a big bottle of Diamond Crystal kosher salt—it dissolves better than table salt and keeps forever. And don’t skimp on the garlic—six cloves give that authentic depth of flavor.
No fresh dill? Dried dill at half the amount works in a pinch, but fresh is ideal. Running low on red pepper flakes? Cayenne pepper at a quarter teaspoon brings the heat. The mustard seeds and peppercorns are non-negotiable for texture, but if you’re feeling fancy, add a bay leaf or two. Swap the white vinegar for apple cider vinegar if you want a sweeter taste—just reduce the sugar slightly. For a spicy kick, add a pinch of cayenne or hot sauce to the brine. And if you’re fermenting, use 1/4 teaspoon of non-iodized salt per quart of water instead of the full brine recipe.
These pickles stay crisp for up to 6 months in the fridge, but the flavor deepens after 2 weeks. Store them in airtight jars with the brine—glass mason jars work best. For extra crunch, pack them tightly and weigh them down with a clean lid or a small plate. If you make a big batch, freeze extras in 1-cup portions—just thaw in the fridge overnight. Trust me, homemade pickles taste better than anything store-bought, and they’re way more customizable.
Why You'll Love This Recipe
- No-Fuss Ingredients: I swear by this recipe because it’s just five things—no specialty jars, no confusing ratios. Grab cucumbers, vinegar, salt, sugar, and water. That’s it. Honestly, if you’ve ever boiled water, you can do this.
- Crisp-Tangy Magic: The salt and sugar balance makes these pickles ridiculously good—crisp outside, tender inside, with that perfect vinegar bite. I’ll be real: I’ve tried store-bought, but these? They’re the only kind I’ll eat now.
- Meal Prep MVP: These keep for weeks in the fridge, so I make a big batch on Sundays. They’re perfect for sandwiches, salads, or just snacking—my kids grab them straight from the jar. (Yes, even on a Tuesday night.)
- Penny-Smart Pantry: Using basic pantry staples means no grocery splurges. A few cucumbers and vinegar stretch into dozens of pickles, and the cost? Laughable. My wallet thanks me every time I open the jar.
Step-by-step instructions for vinegar-infused crunch pickles
Here's the exact method I use to create restaurant-quality pickles at home—crisp, tangy, and packed with flavor.
Prepare the Cucumbers for Perfect Crunch
Start by washing the 2 lb fresh cucumbers thoroughly under cool water to remove any dirt or wax. Using a sharp knife, trim off the blossom ends (the tiny stem end) and cut the cucumbers into ¼-inch thick slices—this ensures even pickling and maximum crunch. I like to use a mandoline for uniform slices, but a sharp knife works too if you're careful.
Place the sliced cucumbers in a large bowl and sprinkle with 0.5 cup diamond crystal kosher salt. Toss gently to coat each slice evenly. Let them sit for 30 minutes—this draws out excess moisture, which prevents soggy pickles. After 30 minutes, rinse the cucumbers under cold water and drain well in a colander. This step is non-negotiable for crispy results.
Create the Flavor-Packed Brine
In a medium saucepan, combine 2 cups white vinegar, 2 cups water, 0.5 cup granulated sugar, 2 tbsp lemon juice, and 0.5 cup apple cider vinegar. Bring to a boil over medium-high heat, stirring until the sugar dissolves completely. This creates the perfect balance of tangy, slightly sweet brine that penetrates the cucumbers.
While the brine heats, prepare the aromatics in a small bowl. Add 6 smashed garlic cloves, 1 tbsp red pepper flakes, 1 tsp mustard seeds, 1 tsp black peppercorns, 0.25 cup fresh dill weeds, and 1 tbsp pickling spice blend. Stir gently to mix—this combination delivers layers of flavor that store-bought pickles can't match. Once the brine boils, remove it from heat and let it cool slightly for 5 minutes before adding the aromatics.
Layer and Pack the Pickling Jar
Sterilize your 4-quart glass jar (or two 2-quart jars) by running it through a dishwasher cycle or boiling it in water for 10 minutes. While it sterilizes, layer the drained cucumber slices into the jar, packing them tightly but not mashing them. This ensures each slice stays crisp and retains its shape.
Add half of the cooled brine and aromatics to the jar, then gently press down on the cucumbers to submerge them completely. Repeat with the remaining cucumbers, brine, and aromatics. Leave about 1 inch of headspace at the top of the jar—this prevents overflow during processing. Use a wooden spoon to press down and remove any air bubbles trapped between the slices.
Process for Long-Term Crunch
Place a clean lid on the jar and tighten the ring until it's just fingertip-tight (not too tight—glass can shatter if sealed airtight). For best results, process the jar in a water bath canner for 10 minutes. If you don't have a canner, refrigerate the jar immediately and enjoy within 2 weeks—though canning extends shelf life to 1 year on the pantry shelf.
After processing, let the jar cool completely before checking the seal. The pickles will develop their signature crunch and tang over 24 hours as the flavors meld. Once cooled, store in a dark, cool place. The longer they sit, the more complex the flavors become—4 weeks is ideal for peak flavor and texture. Serve chilled for that refreshing crunch you crave!
Pro Tips For Making Best Ever Pickle
- USE SLICED CUCUMBERS: DESCRIPTION: Thin, even slices (about 1/4-inch thick) pickle faster and keep their crunch—thick chunks stay rubbery no matter how long you wait. I learned this the hard way when my first batch of "spears" turned out like sad, limp noodles.
- SALT THE BRINE COLD: DESCRIPTION: Stir in the Diamond Crystal salt before heating the vinegar-water mix—it dissolves better and prevents grainy bits in your final brine. After burning my tongue on undissolved salt crystals once, I now add it to the cold liquid and let it sit while I prep the cukes.
- SKIP THE BOILING: DESCRIPTION: Your brine doesn’t need to boil—just heat it until the sugar dissolves (about 180°F), then cool to room temp before adding cucumbers. Boiling wastes energy and can make the pickles taste harsh. I used to overdo it, then realized my grandma’s "perfect" pickles came from a lukewarm bath.
- WEIGH DOWN PROPERLY: DESCRIPTION: Use a clean plate or weight (not random rocks—trust me) to fully submerge cucumbers in the jar, or they’ll ferment unevenly. I once left a jar "mostly covered" and ended up with half-soggy, half-crunchy pickles. A dollar-store ceramic plate solves this every time.
Troubleshooting this dish
Soggy Slices Fix
If your pickles turn out soft instead of crisp, the issue is likely excess moisture. Start by salting the cucumbers for 45 minutes instead of 30—this draws out more liquid. After rinsing, pat them very dry with paper towels before packing into jars.
For extra insurance, add 1 tbsp calcium chloride (available at brew shops) to the brine—it preserves crispness for months. 🥒
Bland Flavor Rescue
Weak flavor? Your brine might not have steeped long enough. Next time, let the aromatics (garlic, dill, spices) steep in the hot brine for 10 minutes before packing the jar. For an instant boost, add 1 tsp fish sauce or soy sauce to the brine—it adds umami depth without overpowering.
Taste the brine before packing; if it’s bland, add a splash of extra vinegar or lemon juice.
Mold or Fuzz Prevention
Cloudy brine or fuzzy pickles mean contamination. Always use sterilized jars and lids—run them through a dishwasher cycle or boil for 10 minutes. For refrigerated pickles, consume within 2 weeks or process in a water bath for long-term storage.
If mold appears, discard the entire batch—never salvage it. To prevent future issues, store jars in a cool, dark place and avoid opening them frequently.
Uneven Pickling
If some slices are pickled while others remain raw, your cucumbers weren’t submerged properly. Pack them tightly in the jar and weigh them down with a clean lid or small plate to keep them under the brine.
For extra security, add 1/2 cup extra vinegar to ensure full coverage. Check slices after 24 hours—if some float, press them down gently with a clean utensil.
Cloudy Brine Solution
Cloudy brine usually means sugar or salt didn’t fully dissolve. Next time, stir the brine constantly while heating until completely clear. For a quick fix, strain the brine through a fine-mesh sieve before packing the jar.
If the cloudiness persists, your vinegar might be old—always use fresh, high-quality vinegar for best results. A splash of lemon juice can also help clarify the brine naturally.
Spice Distribution Issues
If spices settle at the bottom instead of infusing evenly, stir the brine vigorously before packing and give the jar a gentle shake after sealing. For stubborn clumps, crush spices more finely—lightly crush peppercorns and mustard seeds with a mortar and pestle.
If using dried herbs, steep them in the brine for 5 minutes before adding to the jar for better flavor distribution.
Nutrition facts
Frequently asked questions about homemade pickles
Why do some homemade pickles turn out soggy?
Soggy pickles happen when excess moisture isn't removed properly. Always salt cucumbers for 45 minutes (not 30) to draw out more liquid, then pat them very dry with paper towels before packing. Adding 1 tbsp calcium chloride to the brine also helps preserve crispness for months.
Can I make these pickles without vinegar?
While traditional pickles use vinegar, you can ferment them instead for a probiotic-rich version. Use 1/4 tsp non-iodized salt per quart of water, pack cucumbers tightly, and weigh them down. Ferment at room temperature for 3-5 days, then refrigerate. The flavor will be milder but tangier over time.
How long do homemade pickles last?
Properly canned pickles last 1 year in a cool, dark pantry, while refrigerated versions stay fresh for 2-3 months. Always check for mold or off smells—discard if anything looks suspicious. For maximum shelf life, use sterilized jars and leave 1-inch headspace when packing.
What vegetables can I substitute for cucumbers?
Try radishes, carrots, or green beans—they all pickle beautifully! For best results, cut them into similar sizes (¼-inch thick) and adjust cooking times slightly. Radishes pickle in 10 minutes of boiling brine, while carrots need 15 minutes. Experiment with flavors like mustard seeds or citrus peels for variety.
Why did my pickles develop mold?
Mold appears when jars aren't properly sterilized or sealed. Always boil jars/lids for 10 minutes or run through a dishwasher cycle. For refrigerated pickles, consume within 2 weeks. If mold forms, discard the entire batch—never salvage it. Store jars in a cool, dark place to prevent future contamination.