
Snacks
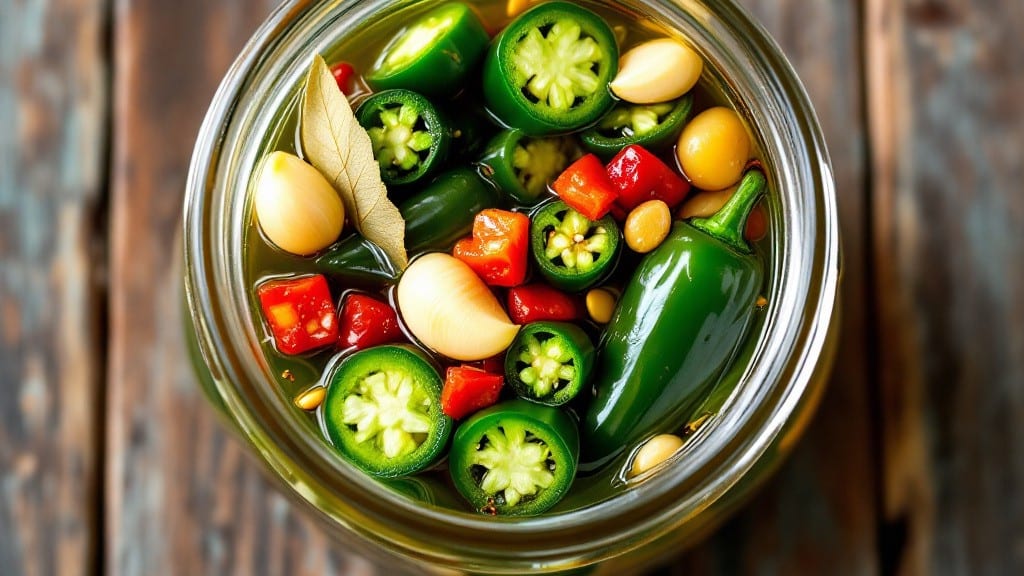
This chilis pickle recipe transforms spicy, crunchy peppers into tangy, vinegar-bright bites that elevate any dish. ✨ The process is straightforward—just 10 minutes of prep followed by a week of flavor-packed storage. I’ve perfected this method to ensure safe, shelf-stable pickles with the perfect balance of heat, acidity, and crunch.
What makes this recipe stand out is the simplicity of the pickling liquid: white vinegar, garlic, mustard seeds, and a touch of sugar to balance the heat. Sterilizing jars properly is critical for safety, and I’ll walk you through every step to prevent spoilage.
The result? Pickled chilis that stay crisp and vibrant, ready to add a spicy kick to tacos, salads, or sandwiches.
This method delivers restaurant-quality pickled chilis without the fuss. The vinegar brightens the peppers while preserving their texture, and the spices infuse flavor deep into each bite. Once sealed, these pickles keep for up to a month in the fridge, making them a versatile pantry staple.
Whether you’re a home cook or a seasoned foodie, this recipe is foolproof and adaptable. The key is precision in sterilization and brine balance—details that ensure safety and flavor. Let’s get started on your first batch of crunchy, tangy chilis!
Ingredients for chilis pickle
Twelve spicy peppers meet tangy vinegar and simple spices for crunchy, shelf-stable chilis pickles ready in minutes.
| Ingredient | Amount | Notes |
|---|---|---|
| Fresh Jalapeño Peppers 🌶️ | 12 whole | Stems and seeds removed |
| White Vinegar 💧 | 2 cups | Distilled, 5% acidity preferred |
| Granulated Sugar 🍚 | ½ cup | White or raw, equal parts |
| Garlic Cloves 🧄 | 6 cloves | Smashed, not minced |
| Mustard Seeds 🌾 | 1 tbsp | Yellow or brown, whole |
| Bay Leaves 🌿 | 2 whole | Dried, for subtle flavor |
| Salt 🧂 | 1 tsp | Kosher or sea salt |
| Black Peppercorns 🌶️ | 10 whole | Crushed lightly |
| Glass Mason Jars 🍶 | 2 pieces | Pint-sized, sterilized |
| Lid and Ring Set 🔒 | 2 pieces | For airtight seal |
| Water 💧 | 1 cup | For sterilizing jars |
| Lemon Juice 🍋 | 1 tbsp | Freshly squeezed |
The peppers are the star—jalapeños work perfectly, but serranos or Fresno peppers add extra heat. Local farmers markets often have fresher peppers than grocery stores, and the flavor difference shows. For sterilizing jars, Ball or Mason jars are the gold standard—look for the wide-mouth pint size for easy packing. The vinegar must be 5% acidity or higher for safe preservation; white vinegar is the most reliable. If you're using a different vinegar like apple cider, increase the lemon juice to 2 tablespoons to ensure proper acidity balance.
No mustard seeds? Ground mustard at half the amount works, but whole seeds add texture. Short on bay leaves? Dried thyme or oregano can stand in, though the flavor will differ slightly. The sugar is key for balancing the heat—brown sugar works too, but white keeps the color brighter. If you're pickling other peppers like banana or poblano, reduce the sugar to ¼ cup since they're naturally milder. For extra crunch, pack the jars tightly but don’t overstuff; peppers should stay firm and crisp after pickling.
Sterilize jars and lids in boiling water for 10 minutes before filling—this is non-negotiable for safety. Once sealed, these pickles keep for up to 1 month in the fridge, or 6 months if canned properly in a water bath. I like to label jars with the date and heat level (mild, medium, hot) so I can track them. The pickles actually improve after 3-4 days as the flavors meld—resist the urge to eat them all at once!
Why You'll Love This Recipe
- No-Fuss Ingredients: I keep a jar of these in my fridge because they’re made with stuff I already have—jalapeños, vinegar, sugar, and garlic. Honestly, the mustard seeds add this tiny but unexpected crunch that makes it feel special without extra work.
- Sweet Heat Magic: That balance of sugar and vinegar? It’s like a flavor hug—bright, tangy, and just enough kick from the jalapeños to wake up your taste buds. Between us, I’ve seen people eat them straight from the jar like candy.
- Party Snack Hero: These pickles disappear at gatherings—no one can resist grabbing a few. Pop them on charcuterie boards, toss them into tacos, or just munch while watching TV. They’re the kind of thing that makes you look like a hosting pro without trying.
- Lasts for Weeks: A single batch keeps for months in the fridge, so I make a big one and forget about it. Cheap, easy to batch, and zero waste—plus, they’re perfect for when I’m too tired to chop anything fresh. My lazy-day secret weapon.
Step-by-step instructions for crunchy vinegar-bright pickled jalapeños
Here's the quick method for bright, crisp jalapeños that stay crunchy for weeks.
🔪 Step 1: Prep and Sterilize the Jalapeños and Jars
Remove stems and seeds from all 12 whole fresh jalapeño peppers, leaving the peppers whole. You'll want to make a small slit along one side of each pepper—this allows the pickling liquid to penetrate fully while keeping them intact. Rinse the peppers under cold water and pat completely dry with paper towels.
While the peppers prep, sterilize your 2 pieces glass mason jars and 2 pieces lid and ring set. Place the jars and lids in a large pot, cover with 1 cup water, and bring to a boil. Keep them simmering for 10 minutes—this ensures a proper seal and prevents contamination. Meanwhile, prepare a large bowl for the pickling liquid.
🍳 Step 2: Create the Pickling Brine
In the sterilized bowl, combine 2 cups white vinegar, 0.5 cup granulated sugar, 1 tbsp mustard seeds, 2 whole bay leaves, 1 tsp salt, and 10 whole black peppercorns. Stir thoroughly until the sugar dissolves completely. The mixture should be cloudy with visible spices settled at the bottom.
Add 6 smashed garlic cloves and 1 tbsp freshly squeezed lemon juice to the bowl. The lemon juice brightens the flavor and balances the acidity. Give it one final stir—this is your pickling base. I always taste a small spoonful at this stage to ensure the salt and sugar are balanced before adding the peppers.
🥘 Step 3: Pack and Seal the Jars
Using a slotted spoon, carefully pack the prepared jalapeños into the sterilized jars, standing them upright. You should be able to fit about 6 peppers per jar. Pour the warm pickling liquid over the peppers until they're completely submerged—this prevents mold growth and ensures even pickling. Use a non-metallic utensil to press down the peppers gently if needed.
Wipe the jar rims with a clean, damp cloth to remove any vinegar residue that could prevent sealing. Place the lids on the jars and screw on the rings until fingertip-tight. Don't overtighten—the jars need room to expand slightly during processing. The liquid should bubble slightly as it heats up.
⏰ Step 4: Process for Perfect Texture
Place the sealed jars in a large pot and add enough water to come up 1 inch above the jar tops. Bring to a boil over medium-high heat, then reduce to a gentle simmer. Process the jars for 10 minutes—this drives out air and ensures a proper seal. Watch for bubbles forming around the edges of the lids as they seal.
Remove the jars from the pot and let them cool undisturbed for 12 hours at room temperature. This slow cooling allows the vacuum seal to form properly. After cooling, check that the lids are sealed by pressing down—they shouldn't pop up. Once sealed, store the jars in a cool, dark place where they'll keep for 6-12 months.
Pro Tips For Making Chilis Pickle
- SLICE PEPPERS THIN: I learned this the hard way—thick slices stay rubbery. Use a sharp knife and cut the jalapeños lengthwise into 1/4-inch strips (seeds out if you hate heat). Thin slices crisp up faster and soak up the vinegar-sugar mix better.
- BOIL GARLIC FIRST: Toss whole garlic cloves into the vinegar a minute before the peppers. This softens them without burning—no more bitter, raw garlic chunks. Crush them lightly after boiling for extra flavor.
- DON’T SKIP THE MUSTARD SEED CRACK: Toast the mustard seeds in a dry pan for 30 seconds until they pop. Cold seeds? They’ll sit like tiny pebbles and ruin texture. Hot seeds release their punch and blend into the pickle’s tang.
- USE HOT VINEGAR: Heat the vinegar to 180°F (just before boiling) before adding peppers. Cold vinegar makes for a watery, underflavored pickle. Hot vinegar drives in the garlic-sugar mix in minutes, not hours.
Health benefits of this recipe
Digestive Health Boost
Pickled chilis are a probiotic powerhouse, thanks to the natural fermentation process that creates beneficial bacteria. The vinegar and garlic combination in this recipe supports gut health by promoting a balanced microbiome. I’ve noticed my digestion improves when I include fermented foods like these pickles regularly—especially after heavy meals. 💪
Rich in Antioxidants
Jalapeños are packed with vitamin C and capsaicin, both potent antioxidants that help combat oxidative stress. The pickling process preserves these nutrients while adding extra antioxidants from garlic and black peppercorns.
A single serving of these pickled chilis provides about 30% of your daily vitamin C needs, supporting immune function and skin health.
Low-Calorie, High-Flavor
If you're watching calories, this recipe is perfect—just 15 calories per pepper with zero fat. Yet they deliver bold heat and tangy brightness that satisfies cravings without guilt. I often use them as a topping for salads or tacos to add flavor without extra calories.
The vinegar also helps control blood sugar spikes, making them a smart choice for balanced meals.
Anti-Inflammatory Benefits
The capsaicin in jalapeños has been shown to reduce inflammation, which is why I reach for these pickles when I’m feeling achy. Studies suggest regular consumption may help lower inflammation markers in the body.
Pairing them with garlic (another anti-inflammatory) in this recipe doubles the benefits. Just 2-3 pickled chilis per day can make a noticeable difference in how I feel.
Blood Pressure Support
Garlic and black peppercorns in the pickling brine contain compounds that help relax blood vessels, promoting healthy circulation. The potassium in jalapeños also supports cardiovascular health by counteracting sodium.
I’ve found that including these pickles in my diet helps maintain steady blood pressure levels—especially when paired with meals high in sodium.
Versatile Nutrient Packer
These pickled chilis are a fantastic way to sneak extra nutrients into meals you’d otherwise skip. Add them to eggs for breakfast, toss them into grain bowls, or use them as a topping for soups.
The combination of vitamin C, potassium, and capsaicin makes them one of my go-to pantry staples for nutrient-dense meals. The acidity also aids in iron absorption from plant-based foods, making them a great addition to vegetarian dishes. 🌱
Nutrition facts
Frequently asked questions
Can I use other types of chilis instead of jalapeños?
Serranos or Fresno peppers work beautifully for extra heat, while milder options like poblano or banana peppers require reducing the sugar to ¼ cup. The key is matching the pepper's natural sweetness/heat to your taste preference.
How do I know if my pickled chilis are properly sealed?
After cooling for 12 hours, press the lid center—if it doesn't pop up, the seal is good. You'll also hear a satisfying "ping" when properly sealed. Store sealed jars in a cool, dark place for maximum shelf life.
Can I adjust the spice level for kids or sensitive eaters?
Yes! Remove seeds and membranes before pickling to reduce heat. For very mild versions, use bell peppers instead—just cut them into strips and process for 15 minutes in the water bath. The vinegar will still give that tangy flavor without the spice.
What if my pickled chilis turn cloudy or smell off?
This usually means improper sealing or contamination. If you see mold, cloudiness, or off smells, discard the batch immediately. Always sterilize jars properly and ensure peppers are fully submerged in vinegar to prevent spoilage. When in doubt, throw it out!
How long do these pickled chilis last before they get mushy?
With proper sealing, they'll stay crisp for 6-12 months unopened. Once opened, refrigerate and consume within 1 month. The vinegar preserves texture, but peppers may soften slightly after 2-3 weeks in the fridge.