
Snacks
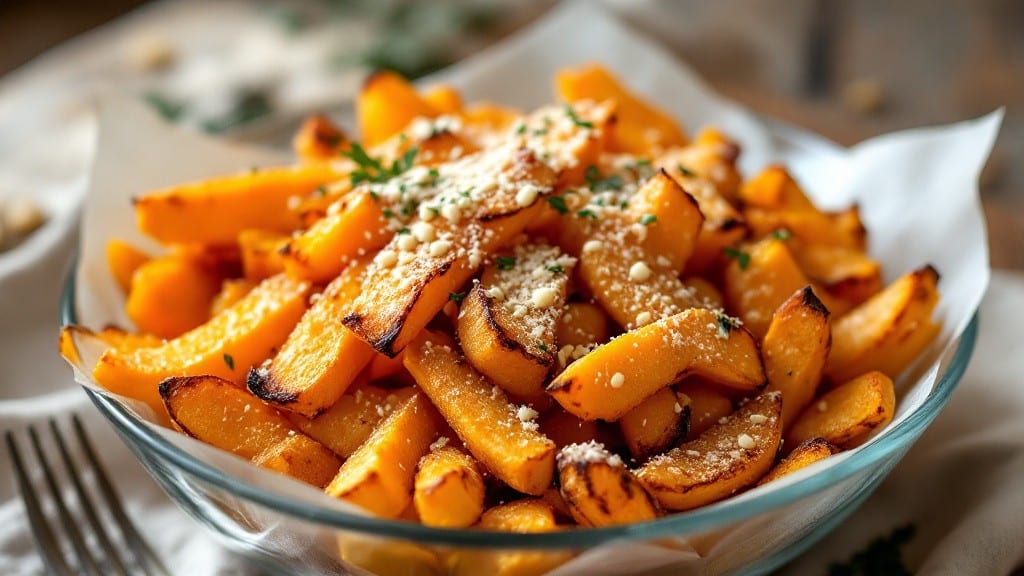
This butternut fries recipe delivers the perfect balance of crispy cornmeal crust and honey-glazed sweetness that transforms a simple snack into a restaurant-worthy dish. The secret lies in proper slicing and soaking to maintain texture, followed by a light cornmeal coating that creates irresistible crunch while keeping the interior tender.
I developed this recipe after years of experimenting with different coatings and glazes, and it consistently delivers the crispy, caramelized edges everyone loves.
The process begins with uniform butternut squash slices that soak in ice water to prevent browning, ensuring each fry cooks evenly. A simple cornmeal batter adds that signature crunch, while a quick honey glaze brings natural sweetness that pairs beautifully with savory seasonings.
Whether you prefer a spicy kick, cheesy richness, or classic herbs, this versatile recipe adapts to any taste preference while maintaining that essential crispy texture.
What you'll achieve is a plate of golden, crispy fries with a satisfying crunch that gives way to tender squash inside, all finished with a glossy honey glaze that adds just the right amount of sweetness.
The cornmeal crust stays crispy even after dipping, making it perfect for serving with your favorite sauces or as a standalone snack. This recipe proves that butternut fries can be both impressive and foolproof, ready in just 45 minutes.
Serve these fries as an appetizer, side dish, or even a main course with a simple salad or protein. The possibilities are endless, from classic ranch to spicy aioli or a tangy maple glaze.
Here's how to make them perfectly every time, with professional results you'll want to recreate again and again.
Ingredients for butternut fries
Nine ingredients transform simple squash into crispy, golden restaurant-style fries you'll crave.
| Ingredient | Amount | Notes |
|---|---|---|
| Medium Butternut Squash 🎃 | 1 whole | Peeled, cut into 1/4-inch slices |
| Yellow Cornmeal 🌾 | 1 cup | Fine grind for best texture |
| All-Purpose Flour 🌾 | ½ cup | Lightly seasoned with salt |
| Large Eggs 🥚 | 2 whole | Beaten for coating |
| Shredded Parmesan Cheese 🧀 | ½ cup | Freshly grated preferred |
| Garlic Powder 🧄 | 1 tsp | For savory depth |
| Ground Black Pepper 🌶️ | ½ tsp | Freshly cracked preferred |
| Vegetable Oil 🫒 | 3 cups | For deep frying (350°F) |
| Ice Water ❄️ | 4 cups | For soaking squash slices |
| Honey 🍯 | ¼ cup | Raw honey for best flavor |
| Cinnamon 🌿 | ¼ tsp | Optional for extra warmth |
| Sea Salt 🧂 | 1 tsp | Kosher preferred |
The squash is everything here—choose one that's firm but yields slightly to pressure. Local farms or Trader Joe's usually have the best quality, but any medium-sized squash works. Cut it into even 1/4-inch slices (a mandoline helps), then soak immediately in ice water to keep them bright. The cornmeal should be fine grind—coarse stays crunchy but can feel gritty. For the oil, vegetable or canola is best since they have high smoke points. Don't skimp on the Parmesan—it adds that savory kick that balances the sweet honey glaze.
No cornmeal? Fine breadcrumbs or panko work in a pinch, but the texture won't be as crispy. Short on honey? Maple syrup or agave at the same amount, but honey's floral notes are ideal. The garlic powder and cinnamon are optional but recommended—they elevate the flavor without overpowering. For extra crunch, add 1/4 cup crushed cornflakes to the cornmeal mix. The ice water soak is crucial—skip it and your fries will brown too fast in the oil. Pro tip: Pat the slices completely dry before frying for maximum crispiness.
These fries reheat surprisingly well—350°F for 5-7 minutes in the oven keeps them crispy. Store leftovers in an airtight container for 3-4 days, but honestly, they disappear fast. For make-ahead prep, fry the fries, then store them in a single layer on a wire rack to keep them crisp. The honey glaze can be made ahead and reheated with the fries. Freezing isn't recommended—they lose their perfect texture, but you can freeze the cooked fries without glaze for 1 month.
Why You'll Love This Recipe
- Here’s what sold me: the cornmeal gives it that addictive crunch, while the Parmesan melts into a savory, cheesy pull. It’s not just sweet squash—it’s got that je ne sais quoi that makes you reach for seconds (and I do).
- I’ll be real: butternut squash is cheaper than potatoes these days, and the ingredients stretch far. Make a big batch, freeze half, and you’ve got a 10-minute snack or side for months. Zero waste, maximum flavor.
Step-by-step instructions for crispy cornmeal-coated butternut fries
Here's how to achieve that perfect crunchy exterior with tender sweet squash inside.
Prepare and Soak the Squash Slices
Peel the medium butternut squash and cut it into ¼-inch thick slices using a sharp chef's knife. For even cooking, aim for uniform thickness—this prevents some pieces from overcooking while others stay underdone. Place all the slices in a large bowl and cover them completely with the 4 cups ice water. This soaking step removes excess starch that would otherwise make your fries gummy.
Let the slices soak for 20-30 minutes while you prepare the coating. The ice water helps draw out moisture from the squash, which is crucial for achieving that crispy texture later. After soaking, drain the water thoroughly using a colander and pat the slices completely dry with paper towels. Any remaining moisture will prevent the cornmeal crust from adhering properly.
Create the Crispy Cornmeal Coating
In a shallow bowl, whisk together the 1 cup yellow cornmeal, 0.5 cup all-purpose flour, 1 tsp garlic powder, 0.5 tsp ground black pepper, and 1 tsp sea salt. The cornmeal gives that signature crispy texture while the flour helps bind everything together. I like to use a fork for this step to avoid creating lumps in the dry mixture.
In another bowl, beat the 2 whole large eggs until just combined, then stir in the 0.5 cup shredded parmesan cheese. The parmesan adds a savory depth that pairs perfectly with the sweet squash. If you're using the optional 0.25 tsp cinnamon, sprinkle it into the dry mixture—just a pinch goes a long way for that warm spice note.
Coat the Squash Slices Thoroughly
Working in batches to avoid overcrowding, dip each squash slice into the beaten egg mixture first, letting any excess drip off. Then immediately roll it in the cornmeal mixture, pressing gently to ensure an even coating. The double-dip technique guarantees that every surface gets that crispy crust. Place the coated slices on a wire rack set over a baking sheet—this allows air to circulate around them, preventing sogginess.
Let the coated fries rest for 10 minutes while you heat the oil. This resting period helps the coating adhere more firmly to the squash. If you're short on time, you can skip this step, but I've found it makes a noticeable difference in how well the crust holds up during frying.
Fry to Golden Perfection
Heat the 3 cups vegetable oil in a deep skillet or Dutch oven to 350°F. Use a thermometer to monitor the temperature—this is critical for even cooking. Once the oil is hot, carefully add the coated squash slices in a single layer. They'll float to the surface, so don't overcrowd the pan or the temperature will drop.
Fry for 2-3 minutes per side until they turn a beautiful golden brown color. You'll know they're ready when they release easily from the oil and have that irresistible crunch. Transfer them to a paper towel-lined plate to drain excess oil. The fries will stay crispy if you work quickly and keep them in a single layer.
Glaze and Serve Immediately
While the fries are still hot, drizzle them with the 0.25 cup honey and toss gently to coat. The heat from the fries will make the honey melt slightly, creating that perfect sticky-sweet glaze. If you prefer, you can warm the honey gently in a small saucepan first for an even smoother finish. Sprinkle with an extra pinch of sea salt to balance the sweetness.
Serve immediately while they're at their crispiest. These fries are best enjoyed right out of the fryer when the exterior is still crackling with crunch and the interior maintains that tender sweetness. For extra presentation, arrange them on a platter with a dusting of shredded parmesan cheese and a sprinkle of ground black pepper—it adds a sophisticated touch that guests will love.
Pro Tips For Making Butternut Fries
- Peel Thin, Cut Even: I learned this the hard way—uneven strips cook at different rates, leaving some raw while others burn. Aim for ¼-inch sticks, and use a sharp knife or mandoline (if you’re brave enough to handle it). The squash’s natural moisture makes it slippery; grip it tight or it’ll squirt out of your hands like a startled frog.
- Dry the Squash First: Wet squash won’t crisp up, no matter how much oil you toss on it. Pat those strips dry with a kitchen towel—really dry them—before dredging in flour. I skip this half the time, and the result? Sad, limp fries instead of golden, crunchy bites. Worth the extra 2 minutes.
- Don’t Overmix the Breading: The second you start stirring the cornmeal, flour, and Parmesan together, the cheese starts clumping. Break it up with your fingers instead—just enough to distribute the shreds evenly. Overmixing turns the coating into glue, and your fries will stick together like a sad, cheesy lump. (Yes, I’ve done this. No, you don’t want to.)
- Double-Fry for Crunch: The first fry cooks the squash; the second seals the deal. After the initial 3–4 minutes in 350°F oil, pull them out, let them rest 1 minute, then hit them with a second quick fry at 375°F for 30 seconds. This isn’t just about texture—it’s how you get that perfect balance of tender inside and shatteringly crisp outside. Trust the process.
Essential equipment for perfect results
Must-Have Fryer Tools
For perfect butternut fries, a deep skillet or Dutch oven is essential—look for All-Clad Stainless or Lodge cast iron for even heat distribution. A thermometer like the Thermoworks Smoke ensures precise 350°F oil temperature, which is critical for crispy results.
I also recommend a slotted spoon to transfer fries without breaking the coating. 🌡️
Prep Essentials
A sharp chef’s knife or mandoline slicer (like the OXO Good Grips) ensures even ¼-inch slices—uniform thickness guarantees even cooking. A wire cooling rack prevents soggy bottoms, while a fine-mesh colander drains excess water after soaking. For coating, shallow bowls keep ingredients organized during the double-dip process.
Optional Upgrades
Invest in a cornmeal sifter (like the Norpro) to avoid lumps in your coating. A small saucepan for warming honey or a pastry brush for glaze application adds professional touches. For extra crunch, a food processor blends cornflakes into fine crumbs—just pulse until smooth. 💡
Oven Alternative
If you prefer baking, use a rimmed baking sheet and parchment paper for easy transfer. A wire rack in the oven (placed on top of the sheet) ensures crispiness.
For even browning, flip fries halfway through the 250°F for 20-25 minutes bake time. This method uses 2 tbsp oil per sheet instead of deep-frying.
Cleanup Made Easy
Keep a paper towel roll nearby for quick oil spills, and a small bowl for discarded parmesan rinds. A dish rack with a drip tray catches honey drips during glaze application. For deep-fry cleanup, a grease disposal container (like EcoScape) safely stores used oil for recycling. 🧼
Nutrition facts
Frequently asked questions
Can I make these butternut fries without deep-frying?
For an oven-baked version, toss the coated slices in 2 tablespoons oil per sheet and bake at 250°F for 20-25 minutes, flipping halfway. Use a wire rack for extra crispiness. The texture won't be as crispy as deep-fried, but it's a healthier alternative with 70% less oil.
Why do my butternut fries turn out soggy?
Sogginess usually happens from excess moisture in the squash. Always pat slices completely dry after soaking, and let coated fries rest 10 minutes before frying. Overcrowding the pan also drops oil temperature—keep batches small for even cooking.
What's the best way to reheat leftover butternut fries?
Reheat at 350°F for 5-7 minutes in the oven on a wire rack to restore crispiness. Avoid microwaving—they'll lose their crunch. For extra crunch, broil for 1-2 minutes at the end, watching closely to prevent burning.
Can I use sweet potato instead of butternut squash?
Yes, but the texture and flavor will differ. Sweet potatoes are starchier, so soak them 30 minutes longer and reduce oil temperature to 325°F to prevent burning. The cornmeal coating works, but the natural sweetness will be more pronounced.
How do I store these fries for later?
Keep fried fries in an airtight container for 3-4 days at room temperature, but they're best fresh. For longer storage, freeze without glaze for 1 month. Reheat from frozen at 375°F for 8-10 minutes on a wire rack.