
Appetizers
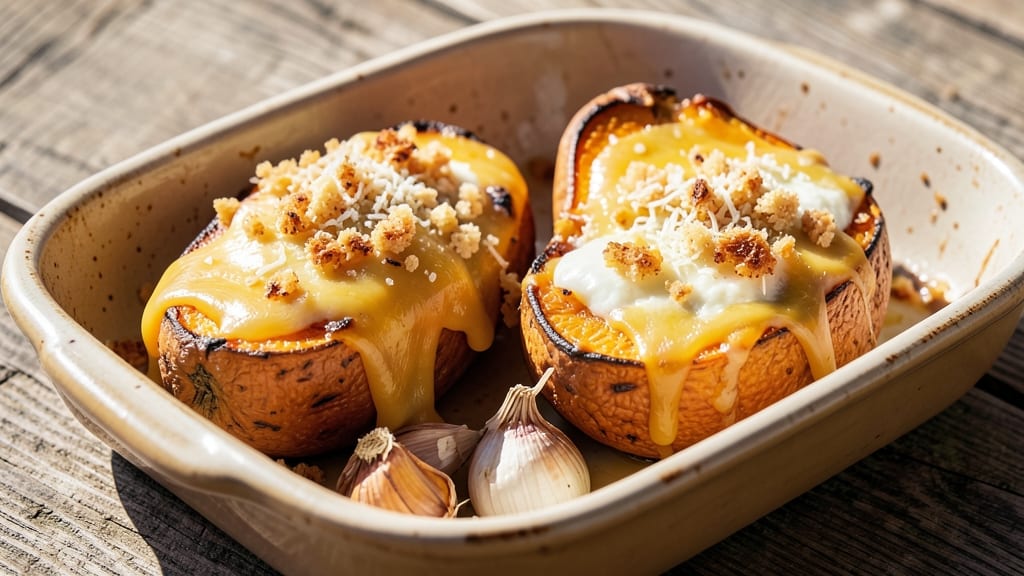
This cheese stuffed squash recipe transforms humble winter squash into a showstopping appetizer with a golden crust and creamy, pull-apart filling that disappears faster than you can say "second helping." The secret lies in balancing tender squash with perfectly melted cheese that creates that irresistible stringy texture we all love.
I developed this recipe after years of experimenting with stuffed squash dishes, and it's now my go-to for holiday gatherings and casual weeknight dinners alike.
The foundation of this dish is properly roasted squash that's tender enough to hold its shape while still providing structure for the cheese filling.
We use a combination of sharp cheddar and mozzarella for that classic cheesy flavor with just the right amount of stretch, then finish with a crispy breadcrumb topping that adds texture contrast.
The oven temperature and timing are critical—too hot and the squash will burn before the cheese melts; too cool and you'll end up with a soggy mess.
What you'll end up with is a dish that's equal parts impressive and comforting—golden-brown squash halves with a creamy cheese center that pulls apart beautifully.
The aroma alone will have everyone gathering around your table, and the first bite delivers that perfect combination of tender squash, rich cheese, and crispy topping. This recipe serves 6 as an appetizer, but be warned: it's difficult to stop at just one piece.
Serve with a simple side salad or crusty bread to soak up any extra cheese, and consider adding a sprinkle of fresh parsley or red pepper flakes for extra flair.
The beauty of this dish is its versatility—it works equally well as a main course for smaller gatherings or as an appetizer that disappears at parties. Let's get started on creating this crowd-pleaser!"
Ingredients for cheese squash
Six ingredients transform humble squash into golden, cheesy showstoppers everyone will beg for seconds.
| Ingredient | Amount | Notes |
|---|---|---|
| Butternut Squash 🎃 | 2 large | Seeded, peeled, cut halves |
| Sharp Cheddar Cheese 🧀 | 1 cup | Shredded, block preferred |
| Mozzarella Cheese 🧀 | 1 cup | Part-skim, shredded |
| Panko Breadcrumbs 🍞 | ½ cup | For crispy topping |
| Parmesan Cheese 🧀 | ¼ cup | Freshly grated, fine |
| Garlic Cloves 🧄 | 3 cloves | Minced for flavor |
| Fresh Parsley 🌿 | ¼ cup | Chopped, for garnish |
| Extra-Virgin Olive Oil 🫒 | 2 tbsp | For brushing squash |
| Butter 🧈 | 2 tbsp | Unsalted, melted |
| Salt 🧂 | 1 tsp | Kosher or sea salt |
| Black Pepper 🌶️ | ½ tsp | Freshly ground |
| Red Pepper Flakes 🔥 | ¼ tsp | Optional for heat |
The squash is everything here. Butternut is ideal—its sweetness balances the cheesy richness—but acorn or delicata work too. Grab the smallest ones available for easier handling, and look for squash with a firm, heavy feel and no soft spots. I always buy mine from Trader Joe's when they're in season—they're consistently sweet and well-priced. Cutting tip: Roast the squash halves cut-side down for even cooking and that perfect golden crust. The cheese filling needs to be the right balance—sharp cheddar for tang, mozzarella for stretch. Pre-shredded gets clumpy, so grab a block and grate it yourself if you can.
No sharp cheddar? Pepper jack or Gruyère works in a pinch. Fresh mozzarella is ideal, but part-skim shredded is fine—just squeeze out excess moisture before mixing. Short on panko? Toasted breadcrumbs or crushed cornflakes add crunch. The garlic can be roasted for a sweeter flavor (just toss whole cloves with olive oil and roast at 400°F for 10 minutes), but fresh minced works too. If you're feeling fancy, add a sprinkle of nutmeg or smoked paprika to the cheese mix. The red pepper flakes are optional but add that perfect party-food kick—start with half the amount if you're sensitive to heat.
This keeps beautifully for 3 days in the fridge, though it's best on day one. Reheat covered at 350°F for 10-15 minutes until bubbly. For make-ahead magic, assemble the stuffed squash and refrigerate uncooked for up to 24 hours—just add 10 minutes to the baking time. The aroma alone will have guests gathering. I always make a double batch—leftovers reheat perfectly and make amazing lunches. Store cooked squash in an airtight container with parchment between layers to keep it from getting soggy.
Why You'll Love This Recipe
- One-Pan Magic: I swear by this recipe—just roast the squash, mix in the cheeses, and top with panko. No extra bowls, no mess, and honestly? That crispy golden crust is worth every second of the 40-minute bake.
- Cheesy Crunch Perfection: Sharp cheddar melts into gooey goodness while the mozzarella stretches just enough to pull on your fork. Then there’s that panko crunch—salty, buttery, and impossible to stop eating. (Yes, even on a Tuesday night.)
- Leftovers That Don’t Suck: Unlike so many casseroles, this reheats beautifully—no soggy squash here. I make a double batch on Sundays because it’s just as satisfying cold the next day, perfect for lunches or a quick snack.
- Budget-Friendly Comfort: Butternut squash is cheaper than you think, and cheddar stretches further than you’d imagine. Between us, this is the kind of dish that makes grocery money last longer while still feeling like a treat. My wallet thanks me every time.
Step-by-step instructions for cheese stuffed squash
Here's how to create that perfect golden crust and creamy, pull-apart filling everyone will love.
Prep and Roast the Squash Halves
Preheat your oven to 400°F and line a baking sheet with parchment paper. Place the two large butternut squash halves cut-side down on the sheet. Brush the exposed flesh generously with 2 tablespoons extra-virgin olive oil—this helps caramelize the edges beautifully. Sprinkle with ½ teaspoon salt and ¼ teaspoon black pepper.
Roast for 20 minutes until the squash softens slightly and you can easily pierce the flesh with a fork. I like to check at the 15-minute mark—it should be tender but not falling apart. Remove from oven and let cool for 5 minutes before stuffing. This cooling step prevents the filling from cooking too quickly and losing its creamy texture.
Prepare the Creamy Cheese Filling
In a medium bowl, combine the 1 cup shredded sharp cheddar cheese and 1 cup shredded part-skim mozzarella cheese. Add the 3 minced garlic cloves, ½ teaspoon salt, ¼ teaspoon black pepper, and ¼ teaspoon red pepper flakes (if using). Mix gently with a fork until just combined—you want the cheeses to stay chunky for that pull-apart texture.
In a small bowl, whisk together the 2 tablespoons melted butter and ½ cup panko breadcrumbs until evenly moistened. This mixture will create the perfect crispy topping. Fold this into your cheese mixture, then sprinkle in the ¼ cup freshly chopped parsley. Taste and adjust seasoning if needed—this is your chance to make sure every bite is perfectly balanced.
Stuff and Bake to Golden Perfection
Carefully transfer each squash half to a baking dish. Spoon the cheese mixture evenly into each cavity, pressing down gently to ensure good contact with the squash walls. This helps distribute heat evenly and prevents the filling from sliding out. Sprinkle the tops with the remaining ¼ cup freshly grated parmesan cheese for extra flavor and a beautiful finish.
Cover the baking dish loosely with foil and bake at 375°F for 25 minutes. Then remove the foil and increase the heat to 400°F, baking for another 10-15 minutes until the tops are golden brown and the filling is bubbly. You'll know it's ready when the cheese is fully melted and the edges are crispy—this is where the magic happens!
Rest and Serve Warm
Let the stuffed squash rest for 5 minutes before serving. This brief resting period allows the filling to set slightly, making it easier to handle and ensuring every bite stays creamy. The squash will be tender but hold its shape, and the cheese filling will be perfectly gooey—not too runny, not too firm.
Garnish with additional chopped parsley if desired and serve immediately. The contrast of warm, creamy cheese against the slightly caramelized squash makes this dish truly special. I like to pair it with a simple arugula salad and crusty bread to soak up all that delicious cheese sauce!
Pro Tips For Making Cheese Squash
- Peel Squash First: I used to roast the whole squash thinking I’d peel it later—big mistake. The skin gets rubbery and sticks like glue when cooked. Shuck the skin off raw with a knife (cut in half lengthwise, scoop out seeds, then peel), then cube. Your filling will stay creamy, not gummy.
- Salt the Cheddar: Sharp cheddar’s already salty, but if you’re using mild or pre-shredded (which has anti-caking salt), add a pinch of flaky sea salt to the mix. Trust me, the cheese won’t taste flat or one-dimensional—it’ll sing.
- Bake Mozzarella Low: Mozzarella melts fast and turns greasy if you blast it with heat. Roast the squash at 375°F (190°C) until tender, then reduce to 350°F (175°C) when adding the cheese. You’ll get a gooey blanket, not a sad, oily puddle.
- Toast Panko Wet: Dry panko burns before it browns. Mix it with 1 tablespoon melted butter or olive oil, then sprinkle over the cheese. The breadcrumbs will crisp up perfectly—no sad, soggy crunch. (Yes, even if you’re impatient like me.)
Make-ahead tips for this cheese squash
Prep Ahead Strategy
Assemble the stuffed squash up to 24 hours in advance and refrigerate uncovered. This allows flavors to meld beautifully while preventing sogginess. I always prep mine the night before—just add 10 extra minutes to baking time when ready to cook.
The squash stays firm, and the cheese filling holds its shape perfectly. 📅
Freezer-Friendly Method
For longer storage, assemble the stuffed squash in a single layer on a baking sheet, cover tightly with plastic wrap, and freeze for up to 2 months. When ready to bake, thaw overnight in the fridge, then bake as directed.
The squash may need 5-10 extra minutes at 400°F to crisp the topping properly. I use this method for holiday parties—just pull from the freezer and bake! ❄️
Reheating Leftovers
Store cooked squash in an airtight container with parchment between layers to prevent sticking. Reheat covered at 350°F for 10-15 minutes until bubbly. For microwave reheating, cover with a damp paper towel and heat at 50% power for 1-2 minutes.
The texture stays creamy, but the topping may lose some crispiness—sprinkle fresh panko after reheating if needed. 🔥
Make-Ahead Garnish Prep
Chop all garnishes (parsley, red pepper flakes) and store in small containers in the fridge. Pre-mix the breadcrumb topping with melted butter and refrigerate until ready to use.
This saves 15 minutes of prep time when assembling. I keep these components ready in my fridge for quick weeknight make-ahead meals. ✨
Portion Control Tips
For parties, assemble individual portions in small baking dishes before freezing. This makes serving easy—just pop in the oven and bake. I use 6-ounce ramekins for perfect single-serving portions. For family meals, halve the recipe and use a 9x13-inch baking dish for even cooking. 🍽️
Flavor Boost Prep
Roast extra garlic cloves with olive oil at 400°F for 10 minutes and store in the fridge. This adds sweetness to your cheese filling without raw garlic's sharpness.
Pre-shred cheeses and store in airtight containers for 3 days—just squeeze out moisture before using. These shortcuts save time while enhancing flavor. 🧄
Nutrition facts
Frequently asked questions
Can I use other types of squash besides butternut?
Acorn or delicata squash work beautifully—they're smaller and sweeter, perfect for individual servings. Just halve them lengthwise (no need to peel) and reduce baking time by 5-10 minutes since they're thinner. For a heartier option, try kabocha squash—it holds its shape well and has a nutty flavor that pairs wonderfully with cheese.
What if my cheese filling gets too runny?
This happens when the squash overcooks or the cheese melts too quickly. To fix it, reduce the oven temperature to 350°F and cover with foil for 5 extra minutes to set the filling. For prevention, use a mix of sharp cheddar and mozzarella (mozzarella stretches more) and avoid overfilling the squash cavities.
Can I make this dish vegetarian or vegan?
For a vegetarian version, use dairy-free cheeses like cashew-based mozzarella and nutritional yeast for cheddar flavor. For vegan, swap cheese for a mix of mashed white beans, nutritional yeast, and vegan butter**. The texture won't be identical, but it'll still be flavorful. Roast extra garlic cloves to add depth to the filling.
How do I prevent the squash from falling apart?
Undercooking is the key! Test squash doneness by piercing with a fork—it should be tender but still hold shape. Use slightly smaller squash (around 1-2 pounds each) for better stability. Also, avoid overstuffing the cavities, and press the filling gently against the sides to create a better seal during baking.
What’s the best way to reheat leftovers?
Oven reheating preserves texture best: cover with foil and bake at 350°F for 10-15 minutes until bubbly. For quick fixes, microwave at 50% power for 1 minute, then sprinkle with fresh panko to restore crispiness. Store in an airtight container with parchment between layers to prevent sogginess.