
Sauces & Condiments
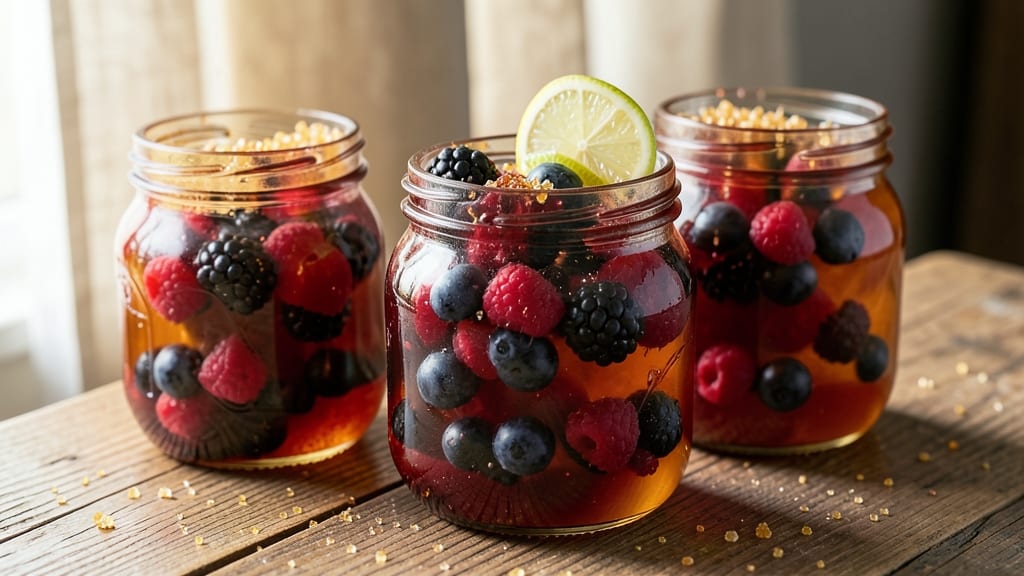
Canning mixed berry jam lets you preserve summer’s brightest flavors in glass jars, ready to spread on toast or drizzle over yogurt all year round. The process requires precision—sterilizing jars, controlling sugar ratios, and mastering the water bath—but the reward is shelf-stable sweetness that tastes freshly picked.
I’ve perfected this method over years of testing, ensuring every batch sets properly while keeping the berries’ vibrant color and tart-sweet balance intact.
This recipe transforms a mix of seasonal berries into a thick, glossy jam with just five core ingredients: fruit, sugar, lemon juice, and pectin. The water bath canning method guarantees safety while preserving texture, and optional adjustments like maple syrup or agave make it adaptable for vegan diets.
Whether you’re a first-time canner or a seasoned pro, the step-by-step process ensures foolproof results with minimal equipment beyond a pot and jars.
By the time you’re done, you’ll have jars of jam that stay fresh for up to a year—no refrigeration needed. The berries break down into a luscious, spreadable consistency while maintaining enough texture to feel homemade, not processed.
The aroma alone will transport you to a summer berry patch, and the flavor? Worth every minute of the canning process. Let’s get started with the exact method I use every season.
This jam works beautifully on toast, as a glaze for meats, or stirred into yogurt, and the recipe scales easily for gifting. Just remember: proper sterilization and processing times are non-negotiable for safe storage. Here’s how to make it right the first time.
Ingredients for mixed berry jam canning
Five core ingredients preserve summer’s berry bounty in glass jars for year-round spreading.
| Ingredient | Amount | Notes |
|---|---|---|
| Mixed Berries 🍓 | 4 cups | Fresh or frozen, pitted if necessary |
| Granulated Sugar 🍬 | 3 cups | White or raw cane preferred |
| Lemon Juice 🍋 | ½ cup | Freshly squeezed, unsweetened |
| Powdered Pectin 🍯 | 1 box | Low-sugar or no-sugar needed type |
| Water 💧 | ½ cup | For pectin activation |
| Ball or Mason Jars 🥫 | 6 whole | 8-ounce size, with lids |
| Optional Maple Syrup or Agave 🍁 | ¼ cup | For vegan sugar substitute |
The berries drive the flavor, so mix seasonal varieties—strawberries, raspberries, and blueberries work beautifully. Farmers markets often have the freshest, most vibrant berries, but frozen works too (thaw first). Sugar isn’t just for sweetness—it helps preserve the jam’s texture and color. Ball or Domino brands are reliable for quality. If using maple syrup or agave, reduce sugar by 1/4 cup to balance sweetness. The pectin matters most—Ball RealFruit or Pomona’s Universal are my go-to brands for perfect set.
No pectin? Extra lemon juice (1 tbsp more) and longer cooking time can help, but results vary. Substitute maple syrup for sugar at a 1:1 ratio, but expect a slightly softer set. For tart berries, add 1/4 cup extra sugar. The jars need to be sterilized—boiling them for 10 minutes in water or running through a dishwasher cycle works. If you’re short on jars, smaller 4-ounce sizes work for gifts but require proportionally less jam. Always check seals after processing to ensure safety.
Processed jars can last up to 1 year unrefrigerated if sealed properly. Store in a cool, dark place like a pantry to preserve color and flavor. Once opened, refrigerate and use within 3 months. The jam thickens as it cools, so don’t overfill jars—leave 1/2-inch headspace. For gifting, wrap jars in kraft paper with twine and a handwritten label. The aroma alone makes it worth the effort, and the first spread on toast is always the best.
Why You'll Love This Recipe
- No Chopping Needed: I just toss in whatever berries I have—strawberries, blueberries, raspberries—no fussing with pits or stems. The lemon juice brightens everything up while keeping the prep under 15 minutes.
- Sweet-Tart Magic: That perfect balance of sugar and lemon juice? It’s like summer in a jar. The pectin thickens it just right, so it’s never too runny or too stiff—always just right.
- Pantry Hero: Slather it on toast, dollop it into yogurt, or use it as a glaze for roasted chicken. Honestly, I’ve even mixed it into cocktails when I’m feeling fancy. It’s my go-to for quick flavor boosts.
- Lasts All Year: One batch feeds me for months—no waste, no stress. And since I can adjust the sugar to my taste, it’s budget-friendly without sacrificing flavor. (Yes, even on a Tuesday night.)
Step-by-step instructions for mixed berry jam canning
Preserve summer's bounty with this foolproof method for vibrant, shelf-stable jam that keeps beautifully.
Prepare the Berries and Sugar Mixture
In a large, heavy-bottomed pot, combine the 4 cups mixed berries with the 3 cups granulated sugar. Stir gently to distribute the sugar evenly, ensuring all berries are coated. If using frozen berries, thaw them first—this prevents uneven heating during cooking. Let the mixture sit for 10 minutes while you prepare the pectin.
This resting period allows the berries to release some natural juices, which helps create a smoother jam texture. If your berries are particularly tart, you might notice a few drops of liquid forming at the bottom of the pot. This is normal and will help balance the sweetness as you cook.
Activate the Pectin and Simmer
In a small bowl, whisk together the 1 box powdered pectin, 0.5 cup lemon juice, and 0.5 cup water until fully dissolved. The pectin should form a smooth, thick paste with no lumps—this is critical for proper gel formation. If you're using the optional 0.25 cup maple syrup or agave, add it to the berry-sugar mixture now.
Return the pot to medium-high heat and bring the berry mixture to a full rolling boil, stirring constantly. Once boiling, add the pectin mixture all at once and stir vigorously for 1 full minute. This rapid stirring ensures the pectin activates properly and distributes evenly throughout the jam. You'll notice the mixture thicken noticeably during this time.
Cook to Proper Gel Stage
Continue boiling the jam for 8-10 minutes, stirring frequently to prevent scorching. The jam is ready when it reaches the gel stage—this is when it sheets off the spoon in a thick, wobbly ribbon that holds its shape when lifted. To test, place a small spoonful on a chilled plate and refrigerate for 2 minutes. If it wrinkles slightly when pushed with a finger, it's ready.
Watch the color carefully—it should deepen to a rich, vibrant hue. If the jam starts to darken too quickly or smells overly cooked, reduce the heat slightly to prevent burning. The lemon juice helps preserve the bright berry colors, but high heat can still cause some darkening over time.
Fill and Seal the Jars
Remove the pot from heat and carefully ladle the hot jam into the 6 whole Ball or Mason jars, filling each to within ¼ inch of the rim. Use a spoon to remove any foam or bubbles that rise to the surface, as these can interfere with proper sealing. Wipe the jar rims with a clean, damp cloth to ensure a tight seal.
Place the lids on the jars and screw on the bands until fingertip-tight—just until resistance is met, no need to force them. The jars will seal themselves as they cool, creating an airtight vacuum. Process the jars in a water bath canner for 10 minutes to sterilize and create the final seal.
Cool and Store for Long-Term Preservation
After processing, remove the jars from the canner and let them cool undisturbed for 12-24 hours. You'll hear a satisfying "ping" as the lids seal—this confirms the jars are properly preserved. Check each lid by pressing down in the center; if it doesn't pop back up, the jar is sealed correctly.
Store the sealed jars in a cool, dark place for up to 1 year. Once opened, refrigerate and consume within 3 months. The jam should maintain its vibrant color and smooth texture, with a perfect balance of sweetness and tartness from the lemon juice. Each jar will yield about 8 ounces of jam, perfect for toast, pastries, or gifting.
Pro Tips For Making Mixed Berry Jam Canning
- Mash Those Berries: After washing, crush the berries just enough to break skins—no need for a puree. Whole berries hold shape better in jars, and you’ll avoid that mushy jam that looks like it’s been sitting too long.
- Measure Sugar Precisely: Use a kitchen scale for sugar—1 tablespoon packed vs. spooned can throw off the set. Too much sugar makes jam cloying; too little risks fermentation. I learned this after tossing a batch that turned into syrup.
- Boil Lemon Juice First: Heat the lemon juice and water to a full boil before adding pectin—this ensures proper activation. Cold pectin = weak set. Sounds picky, but it’s the difference between jam that gels and jam that doesn’t.
- Test Jars Mid-Process: Fill one jar with hot jam early to check consistency—if it sets in 2 minutes, your batch is ready. If not, boil longer. This saves you from overcooking or under-processing the whole batch. (Yes, it’s worth the extra jar.)
Perfect pairings for mixed berry jam canning
Breakfast Spreads
This jam shines on toasted sourdough or brioche—the buttery richness pairs perfectly with its bright berry acidity. I like to spread a thick layer and top with whipped cream or Greek yogurt for extra protein.
For a protein-packed twist, try it on avocado toast with flaky sea salt. The jam’s natural sweetness balances the creaminess beautifully. 🥖
Cheese Board Pairings
Add a small jar of this jam to your next cheese board for a sweet contrast. It complements creamy brie, sharp cheddar, and goat cheese wonderfully. I often include crackers like Waterford wedges or rye bread to cut through the richness.
The lemon in the jam brightens the board, and the berry flavors add a summery touch.
Dessert Glazes
Use this jam as a drizzle for pancakes, French toast, or waffles—the heat from cooking enhances its flavor. For a restaurant-worthy dessert, warm the jam with vanilla bean and brush it over baked apples or peach cobbler.
It also makes an elegant glaze for grilled peaches or strawberries, adding a glossy finish and depth of flavor.
Savory Surprises
Don’t limit this jam to sweet dishes—it’s fantastic with savory flavors. Drizzle it over grilled pork tenderloin or ham before roasting for a sweet-savory glaze. I’ve also used it as a marinade for chicken thighs, mixed with olive oil and garlic.
The acidity tenderizes the meat while adding a fruity brightness.
Beverage Pairings
Enhance your morning coffee or afternoon tea by spreading a thin layer of jam on shortbread cookies or scones. For cocktails, stir a spoonful into sparkling wine or gin fizz for a berry-infused twist.
The jam’s acidity cuts through the richness of dark chocolate, making it a perfect pairing for hot cocoa or molten lava cake. 🍷
Gifting Ideas
This jam makes a thoughtful, long-lasting gift—especially when paired with complementary items. Bundle it with local honey, artisan bread, or cheese for a curated gift basket.
For a festive touch, tie a kitchen twine around the jar and attach a handwritten label with the berry varieties and date. The jam’s vibrant color and rich flavor make it a standout gift for holidays or housewarming presents.
Nutrition facts
Frequently asked questions
Can I use frozen berries instead of fresh?
Yes, frozen berries work perfectly—just thaw them first to prevent uneven cooking. They often have more concentrated flavor, which can enhance your jam. Drain any excess liquid before mixing with sugar to maintain the right consistency.
How do I know when the jam is done?
The jam is ready when it reaches the gel stage: spoon a small amount onto a chilled plate and refrigerate for 2 minutes. If it wrinkles slightly when pushed, it's perfect! This usually takes 8-10 minutes of active boiling after adding pectin.
What if my jam didn't set properly?
If your jam is too runny, it likely didn't reach the gel stage. You can try reheating it with 1 extra tablespoon of pectin and simmering for 5 more minutes. For vegan versions, expect a softer set since maple syrup or agave doesn't thicken like sugar.
How long do homemade jars last?
Properly sealed jars last 1 year unrefrigerated in a cool, dark place. Once opened, refrigerate and consume within 3 months. Always check the seal by pressing the lid center—if it doesn't pop back, the jar is safe.
Can I adjust the sweetness level?
Yes! For tart berries, add 1/4 cup extra sugar. For less sweetness, reduce sugar by 1/4 cup and use 1/4 cup maple syrup or agave instead. The lemon juice helps balance flavors, so don't skip it entirely.